How to Clean Your Dryer Vent and Keep Your Home Safe and Efficient
Keeping your dryer vent clean is crucial for the safety, efficiency, and longevity of your dryer. Over time, lint and debris build up in the vent, causing longer drying times, higher energy bills, and even posing a fire risk.
In this guide, we will show you how to clean your dryer vent safely and effectively, so your dryer works at its best and your home stays secure.
Why Should You Clean Your Dryer Vent?
Well, dryer vents are a common source of household fires. In Canada, approximately 460 house fires occur annually due to clothes dryers, accounting for about 2% of all structure fires.
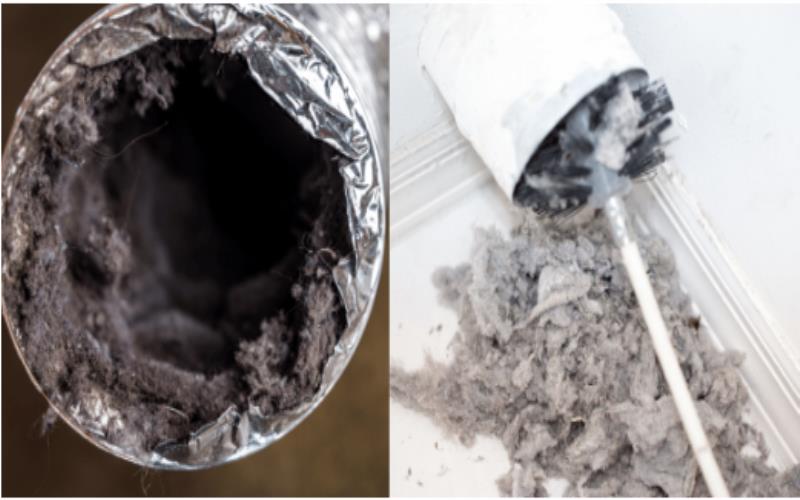
The leading cause of these fires is lint buildup, which can be mitigated by cleaning the lint trap after every use and scheduling professional vent cleanings at least once or twice a year
Additionally, a blocked vent makes your dryer work harder, leading to inefficient drying and higher energy consumption.
By cleaning your dryer vent regularly, you not only lower the risk of a fire but also increase the dryer’s efficiency, cut down on drying time, and extend the life of your appliance.
What You’ll Need to Clean Your Dryer Vent
Tools required to clean your dryer vent:
- A vacuum cleaner with a hose attachment
- A dryer vent cleaning brush
- A screwdriver (if necessary to detach the vent)
- A flashlight (to inspect hard-to-see areas)
- A dryer vent cleaning kit (optional, for more thorough cleaning)
Dryer vent cleaning in 9 simple steps
Step 1: Unplug the Dryer and Turn Off the Gas
First, ensure your safety by unplugging the dryer from the power source. If you have a gas dryer, turn off the gas supply. This will prevent any potential accidents while you are cleaning the vent.
Step 2: Move the Dryer Away from the Wall
Carefully pull the dryer away from the wall to expose the vent and hose. Be mindful not to damage the hose or the surrounding area while moving the dryer. When moving a dryer, you have to be careful not to damage the hose (the flexible tube) or the area where it connects to the dryer or the vent.
Damaging it could cause problems like poor drying or a buildup of lint, which can be a fire hazard
Step 3: Disconnect the Vent Hose
Next, use a screwdriver to loosen and detach the vent hose from the back of the dryer. Some vents may be a little stuck, so you may need to gently wiggle them loose. If the hose is damaged or too old, consider replacing it with a new one to ensure proper airflow.
Step 4: Remove Lint from the Hose
Once the hose is detached, use a vacuum with a hose attachment to remove lint and debris from the vent hose. Be sure to get as deep into the hose as possible to ensure it’s fully cleaned. You can also use a specialized dryer vent brush to loosen any stubborn lint that the vacuum might not pick up.
Step 5: Clean the Vent Duct Inside the Wall
After cleaning the vent hose, focus on the ductwork inside your home. Use a vacuum and a dryer vent brush to remove lint and debris from the duct. Depending on the length of the duct, you may need a long, flexible brush to reach deep inside.
For vents that travel through walls or ceilings, you may want to consider using a professional cleaning service to ensure the duct is completely clear. The goal is to remove all lint and debris to maintain proper airflow and safety.
If you’re unsure where to start, experts like Pro Handy Solutions, who specialize in chimney and dryer vent cleaning, can help ensure your system is thoroughly cleaned and functioning safely.
Step 6: Inspect the Exterior Vent
Don’t forget about the exterior vent! Go outside and check the vent cover where the air exits the house. This area can also become clogged with lint, dirt, or even bird nests. Remove any visible obstructions and clean the vent opening with a brush or your vacuum. Make sure the flap on the vent cover opens freely when the dryer is running.
Step 7: Reattach the Vent Hose
Once everything is cleaned, carefully reattach the vent hose to the back of the dryer. Make sure it’s securely connected to prevent any air leaks. If necessary, use a hose clamp to ensure a tight fit. Avoid using duct tape as it can degrade over time and may not provide a secure seal.
Step 8: Test the Dryer
After reassembling everything, plug the dryer back in and push it back into place. Run the dryer for a few minutes with a towel or two inside to test the airflow. You should feel a strong flow of air coming from the vent. If the airflow is weak or there are any signs of overheating, it may indicate that the vent is still clogged, and you should recheck the cleaning process.
Step 9: Maintain Your Dryer Vent
Now that your dryer vent is clean, it’s essential to maintain it regularly. Cleaning the vent every six months is recommended, but if you use your dryer frequently or have a large household, you may need to clean it more often.
Tips for maintaining a clean and safe dryer vent.
- Don’t Overload the Dryer: Overloading your dryer can cause excessive lint buildup and poor airflow. Always follow the manufacturer’s instructions regarding load size.
- Use Lint Traps: Clean the lint trap after every load to prevent lint from entering the vent system.
- Check for Lint Buildup in the Dryer Drum: Sometimes lint can build up inside the drum. Wipe it down with a damp cloth to remove any excess lint.
- Inspect the Vent Hose: Regularly check the vent hose for any cracks or signs of wear and tear. A damaged hose can reduce airflow and increase the risk of a fire.
- Consider Professional Cleaning: If you’re unable to reach certain parts of the vent system or the buildup is significant, consider hiring a professional dryer vent cleaning service to ensure everything is properly cleaned.
The Benefits of Regular Dryer Vent Cleaning
Regular dryer vent cleaning brings a variety of benefits beyond preventing fires. A clean vent allows the dryer to work more efficiently, which translates to:
- Faster Drying Times: With unrestricted airflow, your clothes will dry faster, saving you time.
- Energy Savings: A well-maintained dryer uses less energy, reducing your electricity bills.
- Improved Dryer Lifespan: By reducing strain on your dryer, regular cleaning can extend its life and delay costly repairs or replacements.
Conclusion
Cleaning your dryer vent is a simple yet vital task that keeps your home safe, saves energy, and helps your dryer run efficiently. By following these easy steps and maintaining your dryer regularly, you’ll not only extend the life of your appliance but also ensure a safer living environment for you and your family.
If you’re in the GTA and need professional help with chimney or dryer vent cleaning, reach out to Pro Handy Solutions at (647) 325-6554. We are a family owned business served more than 500 clients. Don’t wait for a disaster to strike—take action today!


